

Python is a popular language for all sorts of data processing today. Use cases range from web applications and machine learning applications all the way to hardware control on devices like the RaspberryPi. When it comes to these even systems and real-time data processing, leveraging Pub/Sub platforms can add modularity and scalability to your solutions — you can read more about this here.
Read about why I used Google Cloud Platform tools for my hobby projects here.
Objectives
In this article, I will walk through setting up a Python application to publish and consume data from Google’s Pub/Sub.
Time required: 15 minutes
Prerequisites
To follow along, you should have the following:
- A basic understanding of how Python works
- Python 3.x installed on your machine
- A Google Cloud Platform account and a project
Let’s Do Some Coding!
GCP — Service Account Setup
First things first, let's get all the configuration done in GCP. A GCP Service Account and private key are needed to access the Pub/Sub service from a Python application.
The full list of your service accounts can be accessed here and a new service account can be added using this link. Give your account a name and id — both can be the same but the id must be unique — I named mine python-tester.
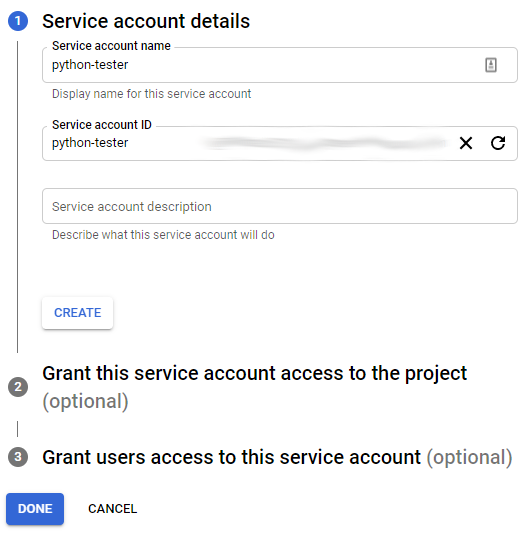
Click create and add the Pub/Sub Publisher and Pub/Sub Subscriber roles to ensure that this account can both consume data from and publish data to your Pub/Sub topic(s).
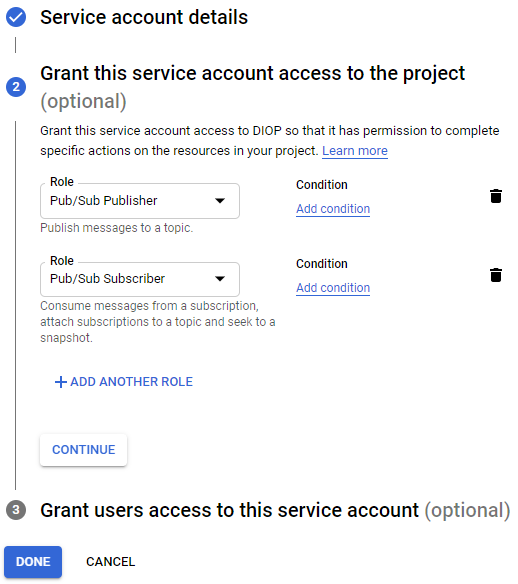
From here you can click done.
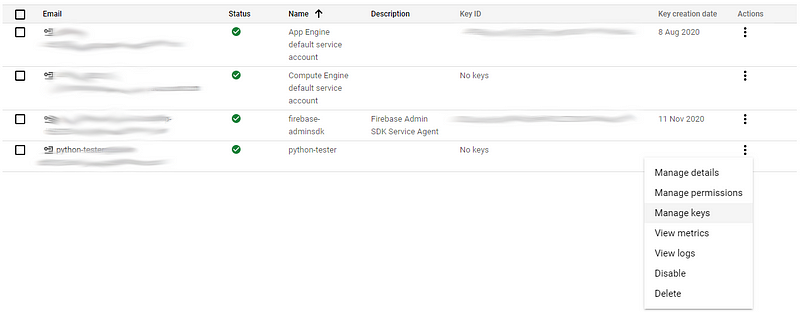
Next, we need to generate a private key that our Python application will use when communicating with GCP. Find the service account you just created and select the Manage keys option.
Use the Add Key button to add a new JSON key.
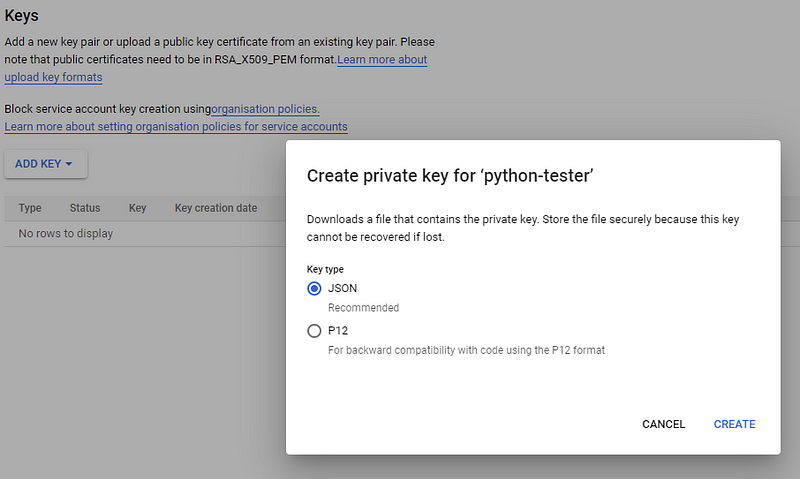
Clicking Create should download the private key file to your default Downloads directory. If you open the file you should see something like this:
{
  "type": "service_account",
  "project_id": "...",
  "private_key_id": "...",
  "private_key": "-----BEGIN PRIVATE KEY-----...",
  "client_email": "python-tester@...",
  "client_id": "...",
  "auth_uri": "https://accounts.google.com/o/oauth2/auth",
  "token_uri": "https://oauth2.googleapis.com/token",
  "auth_provider_x509_cert_url": "...",
  "client_x509_cert_url": "..."
}
Make sure you keep track of this file as our Python application will need it.
GCP — Pub/Sub Topic Setup
Before we can push/pull data from Pub/Sub we need to create a topic. You can see all your active topics here. Create a new topic, give it a name and leave the default subscription option checked — I named my topic my-python-topic .
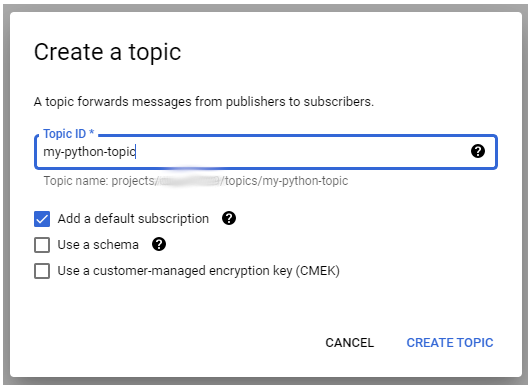
Make sure you leave the Add default subscription option checked and click Create Topic — you should see the new topic appear in your topic list. Your default subscription will have the name of your topic with a -sub suffix, in my case it is named my-python-topic-sub .
Python — Writing the Producer and Consumer
Before writing code, you must have Python 3.x installed along with thegoogle-api-python-client and google-cloud-pubsub GCP libraries. You can install these with pip/pip3 using the following:
pip3 install --upgrade google-api-python-client
pip3 install --upgrade google-cloud-pubsub
Somewhere on your machine create a folder for your Python code.
mkdir pub-sub-test
cd pub-sub-test
Move your private key generated in the GCP — Service Account Setup section to this new folder. If you lost your key, you can generate a new one using the same instructions.
Create your main executable Python file in this directory — I am calling mine code.py and add the following content:
The GCP library expects an environment variable called GOOGLE_APPLICATION_CREDENTIALS to point to the private key. We set this value on line 2 with:
os.environ["GOOGLE_APPLICATION_CREDENTIALS"]="YYYY.json"Make sure to replace YYYY.json with the path/name to your private key file.
PUB_SUB_PROJECT on Line 12 should be updated with the id of your GCP project, you can find the id on the Pub/Sub list page. It would be the value between projects and topics - projects/YYY/topics/my-python-topic.

Your project should now look like this:
├── pub-sub-test
│ ├── code.py
│ ├── YYYY.json
I tried my best to have the code be as self-explanatory as possible but essentially:
process_payload: A callback function that handles events consumed from Pub/Sub, any logic you want to apply to the payload should be added here.
push_payload: Takes a payload (JSON) and pushes it to the provided a Pub/Sub topic/project id combination.
consume_payload: Checks the provided subscription/project combination for new events and if data exists the callback function will be called for processing. The timeout period serves as an interrupt.
The rest of the code continuously pushes and consumes data until the program is terminated. You can run the code with python3 code.py and should see something like this in the terminal:
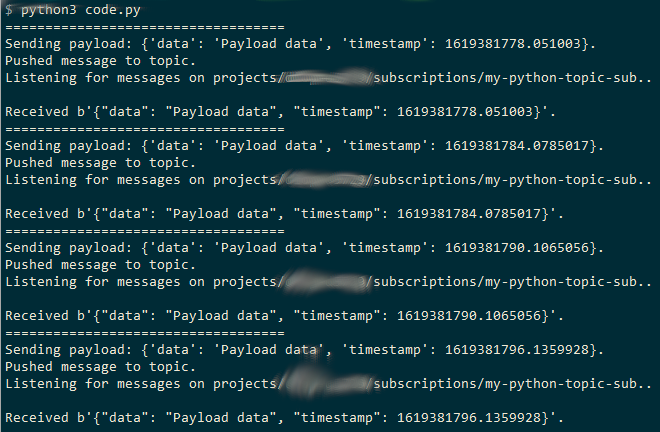
There you have it, a bare-bones implementation but this should be enough to get you jump-started with leveraging GCP’s Pub/Sub with Python.
Conclusion
Google’s Pub/Sub platform is great for handling large amounts of data and decoupling the various components of your architecture. In this article, I walked you through how Pub/Sub can be leveraged with Python applications. I hope that you were able to learn something from this post.
Good luck and happy coding!